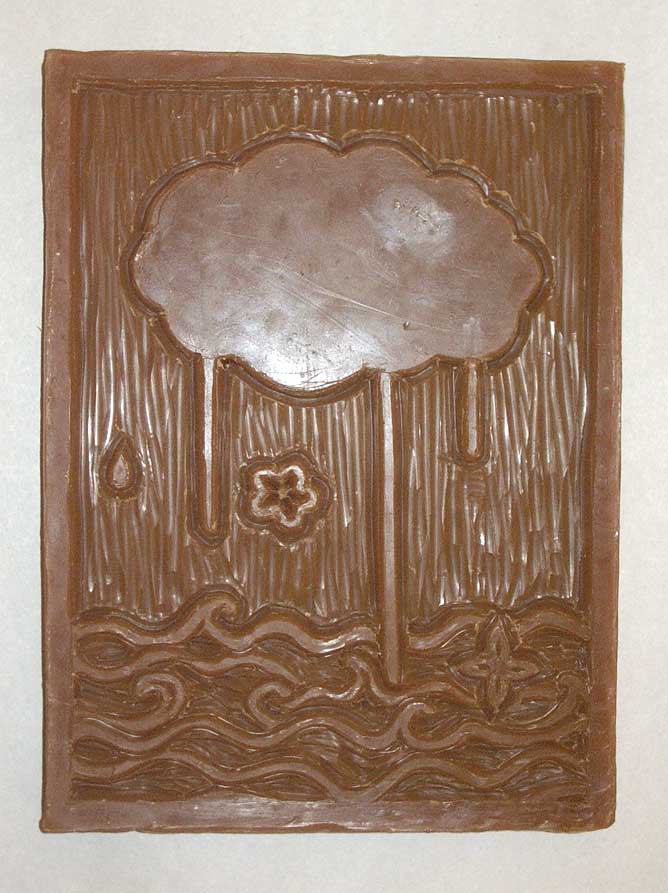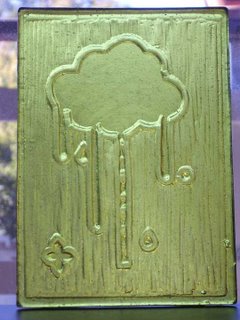
This is a picture of my first project, a finished glass tile. In order to illustrate the process I went through to get the tile I am photographing the various steps of the process for my second project, but first a little background info:
For my PONCHO Artist in Residency I've decided to pursue kiln casting glass tiles at Pratt Fine arts Center in Seattle. My introduction to the process began with a moldmaking workshop where I learned to make plaster molds of tiles and three dimensional objects. We learned to make basic one and two part plaster molds and had a demonstration on making more complicated molds.
In the kiln casting class we have begun by making the form that we wish to cast in wax. This is known as a wax positive. It is surrounded with a plaster silica material to create our mold. Then the wax is steamed out, leaving a negative of the form. Using water displacement we measure how much material is needed to fill the mold and then supply that amount of lead crystal glass. The glass and the mold are loaded into the kiln and then heated or "fired" to the appropriate temperature. The glass becomes molten and fills the mold. Once the glass is brought down to room temperature again (over the course of a week) we can take the mold (now filled with the glass) out of the kiln. We then "devest" the mold by breaking away the plaster-silica, and what we are left with is the glass, which has assumed the shape of our original wax form! This technique is called "lost-wax casting," because the original wax form is melted as a result of the process. The resulting mold is only usable once and is known as a "waste mold" because we have to break it apart in order to get the finished glass form out.
This is the wax tablet that I have just begun to carve into for my second project.

This is the (nearly) completed wax tablet. I will surround this with the plaster-silica mixture to create the mold that will eventually be filled with glass. I attached a base to this wax piece, which is not pictured, but will be apparent in the finished piece.

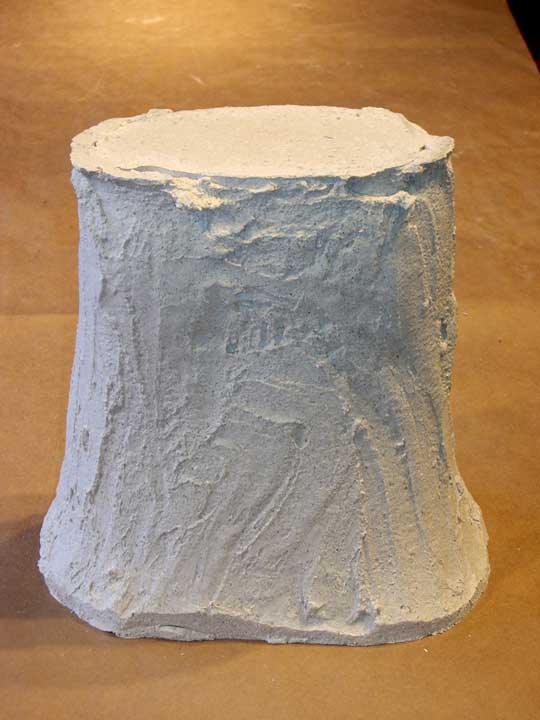
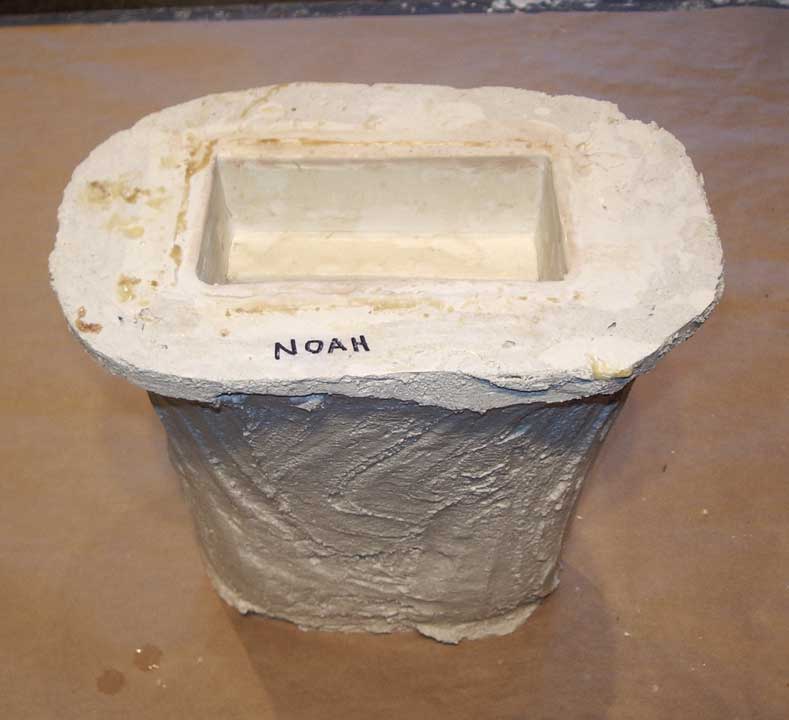
This is an image of the wax form encased in the plaster-silica mold. The wax is standing right-side up within the mold.

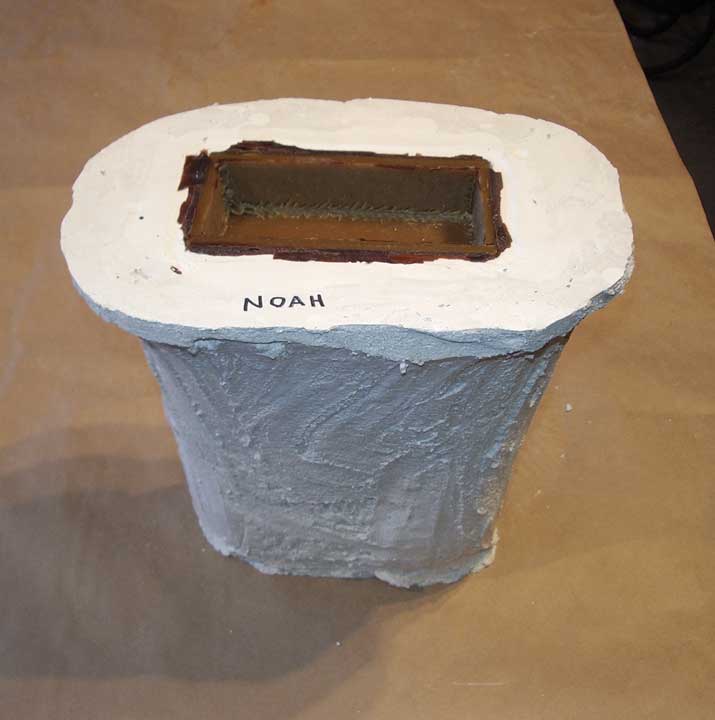
Here the mold is inverted so that the wax form is now upside-down. I will use the area where the wax is exposed to heat the wax, melting it out of the mold and creating room for the glass to occupy later on.

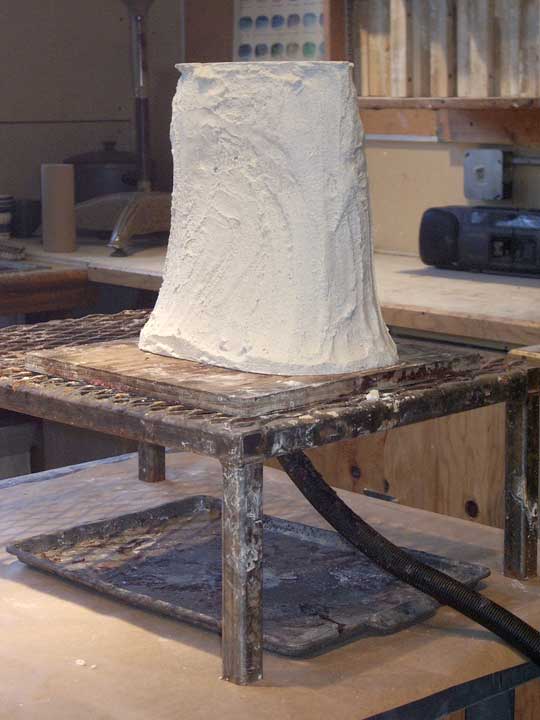
This is an image of the mold with the wax opening on the bottom. It is placed on a perforated platform with a tube providing hot steam, so that the steam will melt out the wax.
Here you can see the wax dripping out of the mold and pooling on top of the newspapers.

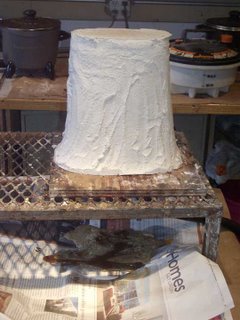
This is the mold after being steamed out. It is now hollow. At this stage it is filled with water so that I can determine the volume of glass needed to fill the form. It's important to measure the volume now, while the mold is freshly steamed out and has absorbed all the water it can take; otherwise, if I try to measure the volume later on when the mold is dry, the plaster-silica will absorb a portion of the water, and I will not get an accurate reading of the volume.

Peering down into the steamed out mold.

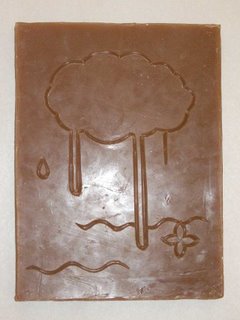
Here you can see the face of the mold where I carved into the wax. The glass will pick up every fine detail, including the slight cracks at the edge of the mold. Hard corners and edges create stress on the mold and are likely to crack as seen here. The glass will fill those cracks and will have to be ground down as part of the finishing process.
The kiln will be loaded with the mold and the crushed glass frit on Tuesday. The firing will take 1 week and I'll pull my mold out of the kiln on the following Tuesday to devest it and see how things went!
 This is an image of my second kiln casting project right after it came out of the kiln. If you haven't checked out the posting immediately prior to this one, I suggest doing so, as things will make a lot more sense. "Devesting" is the process of breaking apart the mold to reveal the sculpture underneath. They do the same thing with bronze casting. It's the most exciting part because as each piece of the mold crumbles away it reveals the nearly finished sculpture below. It's like opening presents on Christmas morning.
  Here I've begun to saw into the crumbly mold material with a butter knife and then remove chuncks as they become loosened.
 Removing more of the mold, piece by piece. You don't want to get too crazy at this stage, or you might scratch or break the glass underneath.
 Here a large chunck of the mold has flaked off to reveal the front of the sculpture.
 This is what the piece looks like after it has been devested.